Applies to
- Terminal Management TMX with Email Configured
Overview
This guide describes how to create a weekly scheduled report using an Inventory group to report on specified bulk products. See Scheduling Email Reports for a detailed explanation of settings for Scheduled Reports.
Creating an Inventory Group
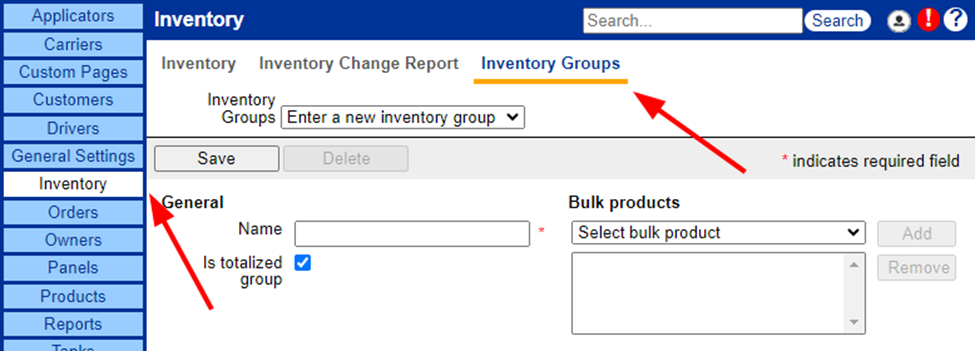
Found in the “Inventory” section of Terminal Management TMX, “Inventory Groups” allows for the creation and management of groupings of products. By default the top “Inventory Groups” dropdown is set to “Enter a new inventory group” for creating a new group.
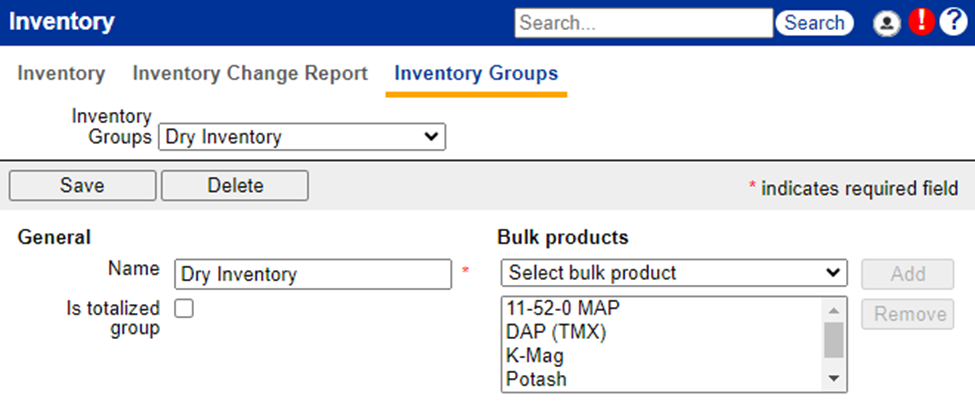
To create a new “Inventory Group” give it a name; in this case the “Is totalized group” box should also be cleared. To add bulk products to the group, select them from the “Select bulk product” dropdown menu and click the “add” button. Once all products have been added, click “Save” at top left to record all changes. An example is shown below.
Creating the Scheduled Inventory Report

After creating the inventory group, the scheduled email report can be set up. Scheduled Email reports are managed in the “Reports” section of Terminal Management TMX under the “E-mail Reports” tab.
For a weekly Inventory Report, the setup will look like the image below:
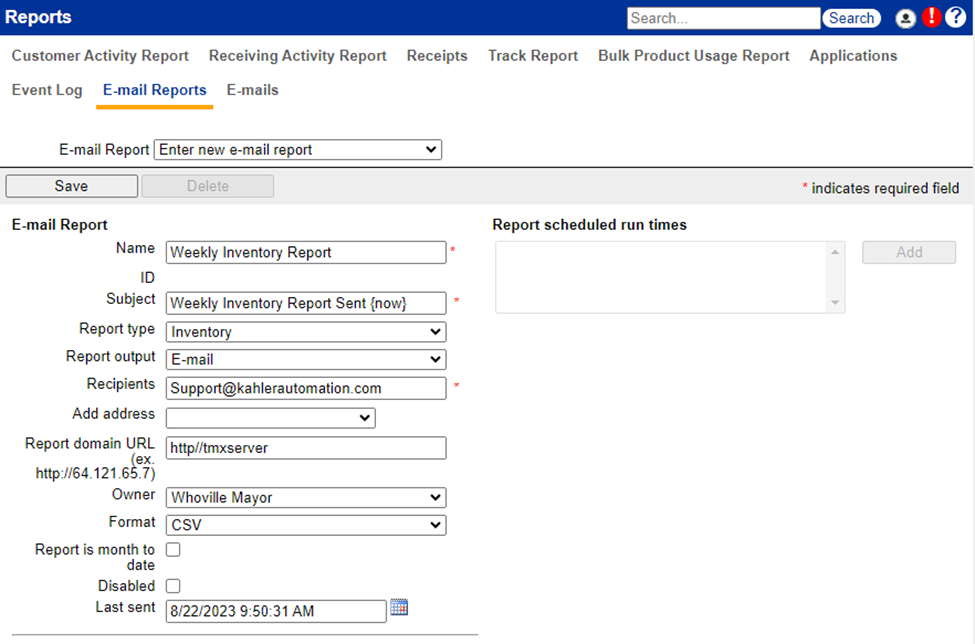
Starting at the top:
- Name: The name of the report. This is how the report will be titled in Terminal Management TMX. Here the name is “Weekly Inventory Report.”
- Subject: This is the subject the E-mailed report will have when it is sent out. Here the subject is “Weekly Inventory Report Sent {now}.”
- {now} will be replaced by the time the report was sent.
- Report Type: The type of report to be sent. Here the report type is “Inventory.”
- Report Output: Either “E-mail” (default) or “Save File” may be chosen. Here “E-mail” is chosen.
- Recipients: A comma or semi-colon separated list of e-mail addresses that the report should be sent to. Here the report is set to E-mail “support@kahlerautomation.com”
- Report domain URL: The domain to use when creating links in the report. If nothing is specified, links may not work. This should be the name or IP address of the TMX server.
- Owner: The owner of the report. If the user logged in has been assigned to a specific owner, only the reports for that owner will be available to the user.
- Format: Options are “HTML,” “HTML (Printer Friendly),” and “CSV.” Here “CSV” is chosen to allow for importing into Microsoft Excel.
- Report is month to date: If enabled, the report will be run on data from the beginning of the month to the present time. Here this is left cleared as it down not affects the inventory report.
- Disabled: Specifies if the report should be e-mailed out. If a report is disabled, it will be logged that the report was not run due to being disabled.
- Last sent: The date of the report, updated automatically. This value is used on reports that include data from the last time they were sent.
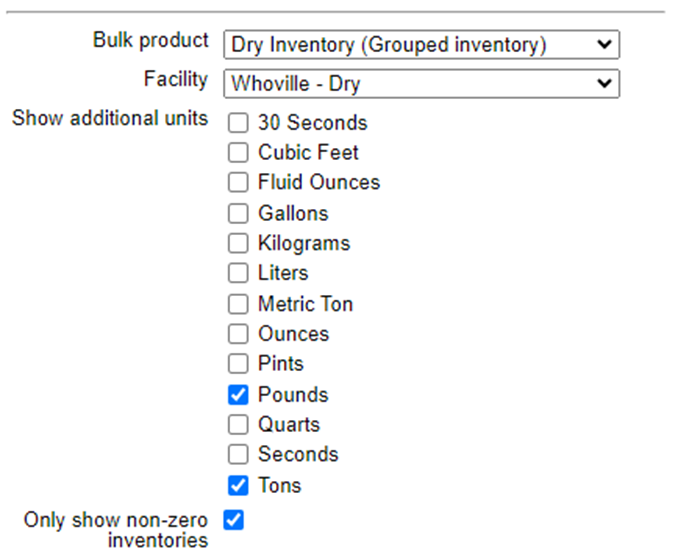
Report specific configuration: These options depend on the report type selected, and are shown on the left-hand side below the horizontal dividing line. Shown below is the report specific configuration for the inventory report.
- Bulk product: This dropdown allows selection of the bulk product(s) the report should apply to. Inventory groups are shown at the bottom of the list and allow multiple bulk products to be configured. Here the group “Dry Inventory” that was created earlier is chosen.
- Facility: The facility the inventory report should apply to. Inventory is tracked separately per facility. Here it is set for the dry facility.
- Show additional units: By default, the inventory report uses the unit that inventory is tracked in. Here “Pounds” and “Tons” are selected.
- Only show non-zero inventories: This prevents the display of bulk products that have a zero inventory level.
Finally, once the report is configured, the schedule(s) need to be added. To do so, first click “Save” at the top of the page to save the report to the database and unlock the scheduling section on the right side of the screen.
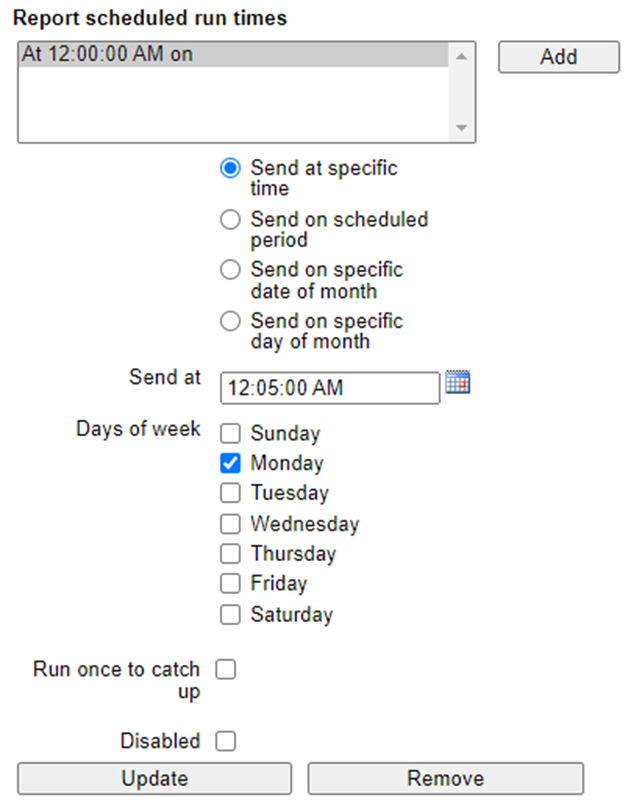
Click “Add” to create a new schedule. To send the report on a weekly schedule use “Send at specific time,” set the “Send at” to a time (here “12:05:00 AM”) and “Days of the week” to one or more days (here set to Monday). This example inventory report will be sent once a week at 12:05 AM on Mondays.
Click “Update” to save the schedule to the report, and the “Weekly Inventory Report” is fully configured.
Further Reading
Still Need Help?
Submit an online web ticket or call us at Kahler Automation 507-235-6648 Option 2.